How to document and explain your IBS for the best medical care.
DIY Storage Bean Bag Chair: A Place to Hide The Mess!
February 14, 2014

Every morning when I go in to wake my daughter, I dream about the Unlazy Days of Summer to come where I can clear my head of all my Alpha Mom duties, and focus on re-organizing her room. But with all of the snow days, there have been many so many moments unfilled of appointments and meetings and carpools that I decided to check a box off on my list. And her room was at the top. To say she is a hoarder would be an understatement. She saves flower petals and beads and pieces of paper with little notes on them. But of all her “collections,” the most overwhelming one is her ever-growing stash of stuffed animals. I decided to create a bean bag chair to store all of that mess, but leave easy access to those toys.
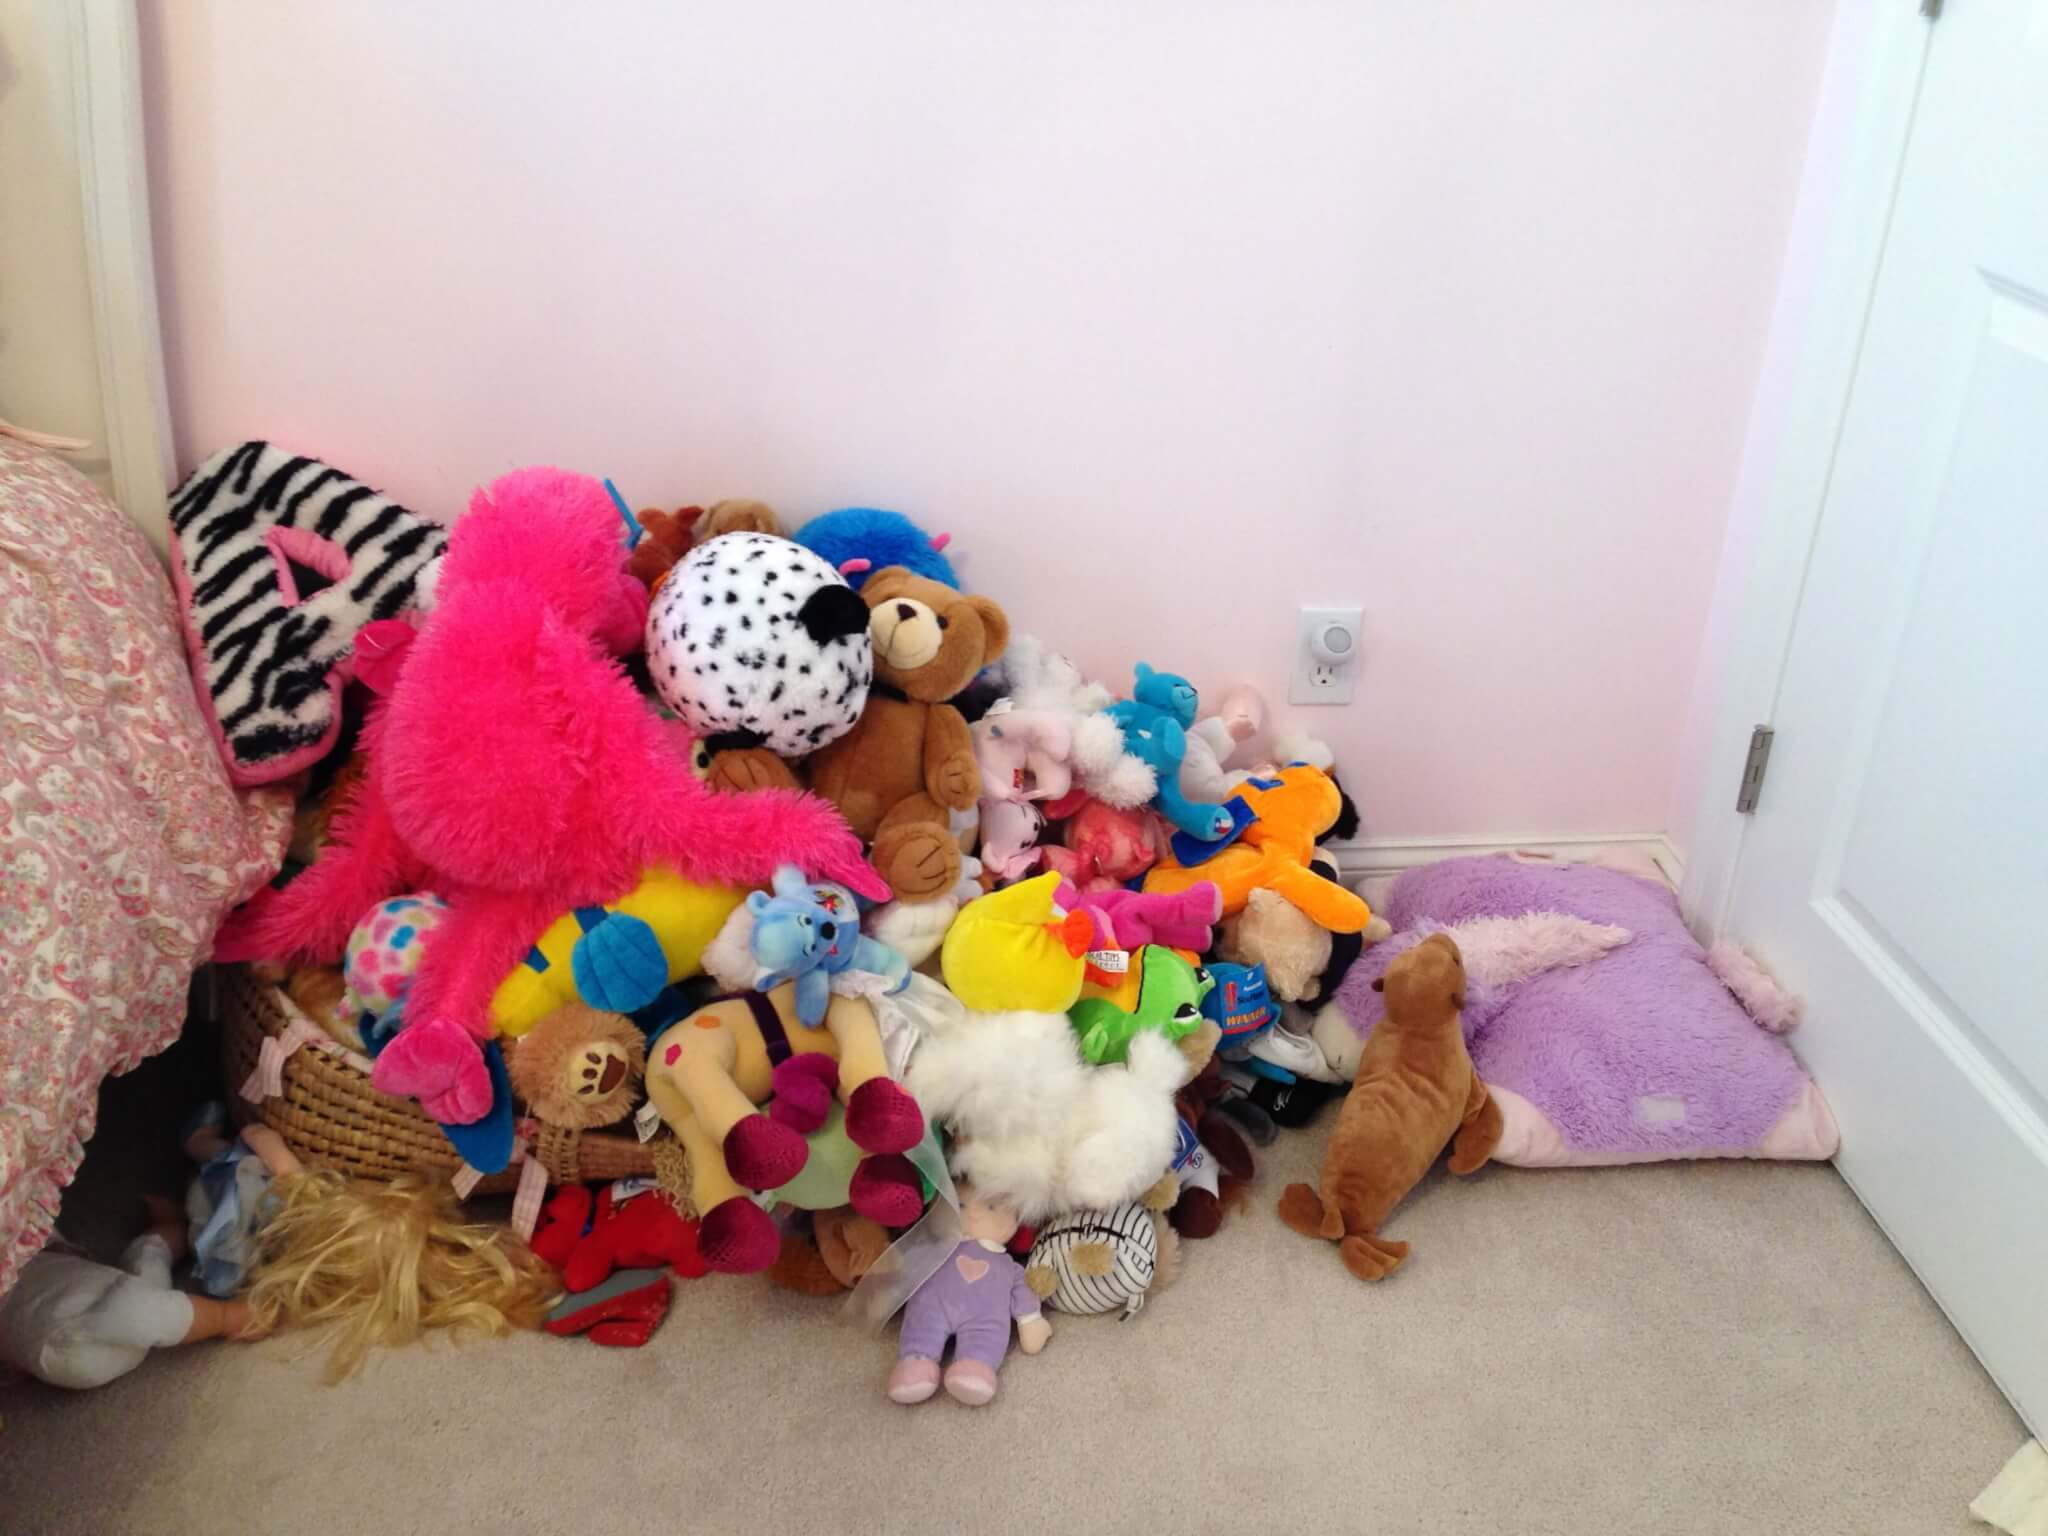
So many animals that her closet door doesn’t fully open.
Believe it or not, there is a Moses basket under all of that. The plan, when she outgrew it as an infant, was to keep it in her room as storage for her stuffed toys. But the toys outgrew the basket before the girl did – not letting me replace it for something larger… until now. I didn’t so much as ask her if I could make alternative storage so much as tell her a new storage arrangement was necessary or the animals were going to be living in the basement by summer. Risking the loss of her toys in her room, she agreed to let me come up with some way to corral the crowd.
Did you know that crafting is my hobby, but my expertise is as a Registered Dietitian specializing in gut health?
If you want to learn more about gut health and how the low-FODMAP can help, I have a free video training that explains 3 Strategies for Success with the Low-FODMAP Diet. You can click here to get instant access to this training, which can be very helpful to understand more of the why behind this specific diet for people with gut health issues.
I didn’t want to buy anything, I wanted to upcycle something. A cardboard box or something of the like, covered in fabric would work. Or, I could come up with something just from the fabric. An idea came to mind in the wee hours of the morning when I do my best thinking. A bean bag! But not really a bean bag, more of a stuffed animal bag. I went to the craft room to start planning.
I started my shadow box craft business the year my daughter was born. Over the past 11 years, I have collected a hefty stash of fabric. Times and styles have changed, so I have lots of fabrics that are not as popular as they once were. My challenge was to find enough yardage of six fabrics to make a cube and that matched her room and style.
This is what I came up with:

A little girly, a little spunky, and a little sweet, just like my girl.
I didn’t have a pattern, but I knew I wanted to make a cube, so I cut all of the fabric into 24″ squares. To be honest, this kamikaze crafter cut the fabric into 36″ squares but it looked HUGE when pinned, so I started over. Once all of the fabric was cut to a normal size, I planned out which patterns would go where.

The yellow will be the bottom and the roses will be the top. The other pieces will be the sides of the cube.
Time to start (re)pinning! I sewed all of the side pieces to each other with a 1/2″ seam allowance. I didn’t measure the seam allowance; I pinned the pieces together and I used a magnet guide positioned 1/2″ from my needle for a (near) perfectly straight line.

Three out of the four sides pinned

Sewing the edges with a 1/2″ seam allowance using the magnet guide.
When all of the sides were finished, I pinned the bottom piece on and sewed three of the four edges. On the fourth edge, I sewed a strip of Velcro that I found in my sewing kit and then stitched the other side of the Velcro to the remaining side piece.

Velcro was perhaps the best invention of the 20th century.
Now it was time to sew the side pieces to the top panel. This would be easy to do now that the bottom panel had one side completely open, thanks to my Velcro closure! Once all of the seams were sewn, I decided that I should reinforce the corners. This is where I apologize to the real sewers out there. I know how to wind a bobbin and thread a machine and press a pedal, but that’s as far as I go with sewing machines and proper sewing techniques. And this is where the Kamikaze Crafter steps in: I sewed a diagonal line across each corner with the notion that it would stop the seam from splitting once the bag got some use.

Here I go!

I “secured” the Velcro corners as well.
Again, I don’t use proper sewing etiquette, so no corners were snipped, no seams were ironed. I turned the cube right-side-out and got to stuffing!

That’s a lot of stuffed animals!
The cube was big enough not only to fit the stuffed toys, but it also fit all of the autograph and BFF pillows she has accumulated. Once everything was inside, I sealed the Velcro, flipped the bag over, and hoped that the seams would hold when she sat on it.

Cute, right? But would it hold?

The “after” was such an “ahh” moment for me.
The big test would be two-fold: Would it hold once the toy bag was sat upon and would she like it? I am happy to report that I was two for two!

What could be better than a good book and a comfy place to sit?
I have to say that it felt good to check a box six months early on my Unlazy Days of Summer list, but it feels even better to wake her up in the morning and see an uncluttered. room. Ahhh…
Think you’ll make one for your “collector?’
PS Did you know that I might have DIY skills, but my real expertise is as a Registered Dietitian, subscribing to a non-diet approach to wellness? Learn a bit more about it by exploring my “diet-free living” posts on my blog. Want to take a deeper dive? Download my FREE e-book, “The Inner Girl Power Challenge,” and kick the dieting habit for good!

Beth Rosen
Eating Attitudes™ & Gut Expert
Beth Rosen, MS, RD, CDN is a Registered Dietitian and owner of Beth Rosen Nutrition. She practices a non-diet philosophy and is a Health at Every Size" practitioner. Her goal is to end the pain of diet culture, one person at a time. Beth's techniques and programs empower chronic dieters, and those who consider themselves emotional and /or stress eaters, to ditch the vicious cycle of dieting, eat fearlessly by removing Food and diet rules, and mend their relationship with food and their bodies. Beth's works face-to-face with clients in Southbury, CT, and virtually with clients, worldwide.


